It happens to everyone. A piece of greenware blows up, sending ceramic shards flying everywhere. You’re lucky if the explosion doesn’t take down other pieces in the process. A waste of clay and hard work… and tons of fun to clean up.
But why do pieces explode in the kiln? The culprit is too much moisture in your greenware. At 212°F degrees water turns into steam. The pressure from the steam, and nowhere for it to escape, causes the piece to explode. If there’s too much moisture in your greenware, especially moisture inside hollow air pockets within the clay, you run the risk of having your greenware explode.
But never fear, there’s a few ways you can dramatically reduce the chances of pieces blowing up in the kiln.
5 Ways to Prevent Explosions in Your Kiln
1. Air dry pieces for as long as possible. I know, depending on where you live, this is easier said than done. If you’re in an arid climate like Sante Fe, New Mexico, you probably don’t have a big problem with drying your pieces. But if you’re in a humid climate like Houston, Texas, it takes a while for greenware to dry out.
So how can you know if your piece still has too much moisture inside? Here’s two quick tests:
- Put the greenware up to your cheek. Is it colder than room temperature? It still has too much moisture in it. Let it dry for longer.
- Place the greenware on a sheet of paper. Does the paper wrinkle? If so, there is still moisture trying to escape the piece. Keep on letting it dry.
2. Create a hole for steam to escape in hollow forms.When you build hollow forms, you need a hole for steam to escape. Otherwise a hollow piece without a hole can become a grenade in the kiln. While the clay is still leather hard, use a needle tool to make a small inconspicuous hole somewhere on the piece. If you forget and the piece is already bone-dry, just use a drill bit. Make sure the hole is large enough, so that when the clay naturally shrinks from moisture loss, the hole still remains big enough for steam to escape.
3. Don’t build thicker than 1 inch. Alright, I know this rule is breakable. It’s possible to fire a whole 25 pound bag of clay without explosions. But it takes some patience and a very long kiln firing time. But for most projects, less than 1 inch of clay thickness is a good rule of thumb. It lowers the risk of having pockets of air and moisture deep within the piece. Your pieces will dry faster and be less heavy after firing.
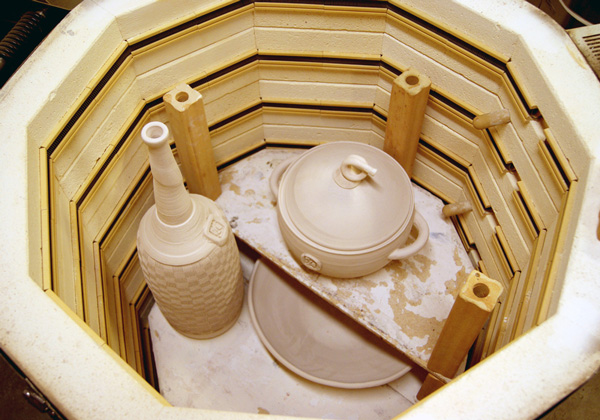
4. Fire using a long preheat. If you have a programmable electric kiln, use your preheat function. Most electric kilns can hold temperature at 180°-200°F for a programmable amount of time to allow moisture to evaporate from the greenware before the kiln heats up past 212°F. Consult your kiln’s manual for more details on how to program the pre-heat.
5. Fire slow. This works for both older cone firing kilns and newer programmable electronic kilns. When in doubt about the dryness of the piece, fire slow. On newer electronic kilns – consult your manual for the slowest programmable speed. For example, on a SKUTT kiln, this would be the “slow” button when using cone fire mode. On older kilns that use a cone to fire and a switch to control time, start with the kiln on low for 4 hours, medium for 3 and then switch to high until the cone melts.
An exploded piece is a frustrating thing. But with a combination of these tips, you can reduce your chances of it happening.
So my fellow clay geeks, do you have any extra tips and tricks for drying pieces? Or what’s the worst blow up you’ve had in your kiln? Let us know in the comments field below.
 ClayGeek Clay — it's what we do.


I have used vinegar in my slip for a couple of years it works magic glue on all the elementary school pieces. 720 and I only lost one monsters arm!
How much vinegar (ratio)?
1/4 vinegar to water…enough to make is smell like Easter eggs!
I use vinegar too. Works great,
As an ceramics teacher, my first year, I lost tens of pieces to explosions!
So I always “pre-bake” the bisque-fire clay pieces on top of a firing kiln. It saves energy because I am using the heat from the kiln, but it’s diffused by the actual walls of the kiln. Haven’t had an explosion since I learned this trick. If you let the clay dry naturally it could take weeks to dry.
That sounds such a good idea. Just wondered if putting greenware on top of a glaze firing is too hot a kiln? Also how dry do the pieces need to be please? : )
Hi Lit- I would be careful using this technique. Especially placing a piece on a kiln that is currently firing. It can cause pieces to crack and/or warp considerably due to uneven drying (as in, the kiln surface its self is hotter than the ambient temperature around the kiln). I know a few art instructors who do this with very simple pieces- but only on a kiln that’s completed the current firing and is only warm.
I had worked on a piece at school for about 6 weeks. It was a Renaissance-y elven girl, was about 9 in. tall and really heavy.. I was rushed on dry time, so they put it on a long preheat, took 2 days to finish. Unfortunately, even though I hollowed it out, the opening to the hollowed spots were at the bottom, so I’m guessing since it was pretty much completely covered, the body exploded into a million pieces, leaving the head in just about perfect condition.. Being the super emotional person I am, when I saw it, I couldn’t help but cry about it all day.
Oh, no!! I feel ya on the frustration AND crying! There’s a chance that there might have still been a pocket of moisture in a hollowed out portion of the piece. Also, even if you’re doing an extended firing, if the piece isn’t “air dry” enough then the pre-heat might not have been long enough (pre-heat is when the kiln is hovering in temperature at around 180-200 degree Fahrenheit). You can either extend the time of the pre-heat portion of the kiln firing or allow it to air dry longer. Don’t give up though! Next time you have to fire a large piece, contact us and we’ll help you out.
I had an explosion not that long ago due to moisture! I got impatient. I have learned to wait!
Patience and planning is key… along with a good heat gun! 😉
Im having the same issues. Customers get upset when you have to let pieces dry for a month because of where you live, ne mo right on the mississippi. All that work and still have pieces blow up. Its so disheartening. And customers dont understand. Ugh being a potter is what I love but its hard as heck!
I live in Memphis, TN and it is very humid here, too. I’m glad you posted about letting pieces dry out for a month because I have been reading posts from other potters about pieces drying in 4 or 5 days. That is never the case for me. I have had plenty of kiln-bombs and each time it takes me by surprise. Its good to know that waiting a month for pieces to dry is not excessive.
When I teach summer clay camps, I’m under the gun to fire projects in time to go home Friday. I sometimes even put pieces in the kiln wet, dripping with underglazes. The key to not breaking any art, for me, has been poking quite a few holes, especially at every joint (shoulders, hips, noses, sides of big eyeballs etc.) and candling the kiln by putting a stilt under the lid to prop it open a few inches. After a few hours, I remove the stilt and fire the kiln as slow as possible.
Be sure the airb is circulating. I use fans but never point them directly at the Clay work- they would dry too fast on one side. I do, however, point fans in many directions around the room to help create some air movement. Seems to cut drying time by a couple of days. And always slow heat on 200 for 6 hours before ramping up a firing.
I know this is an old article but a tip
I use is a closet with a dehumidifier. Living in NC where it is really humid it is helpful to dry things faster.
Candling! Once I started candling, I never had another explosion. I let my pieces sit in the kiln at 200 F for about 3 or 4 hours before starting a bisque firing. Some people candle 24 hours, but I think that’s rough on the kiln elements. Living in Florida where the humidity is 300%, there is just NO WAY to completely dry a piece sometimes. As soon as I started candling, I never had another explosion in my kiln.
Another way to dry wet ware quickly is to cover it completely with plastic and place it in the sun. The water evaporates evenly even on the side facing the sun. About every hour I turn the plastic over so water doesn’t build up and drip like rain into a bowl. Make sure the wind doesn’t pull an edge of the plastic up, because the greenhouse effect doesn’t work. We’ve been doing this at my school for years and the only time I had warpage was on a slab piece that wasn’t thick enough for my intended purpose.
I am a Ceramics teacher in a high school. Because long drying times are not practical, I have frequently put just created ceramics items into the kiln and successfully fired them. My secret is to surround each ceramic piece with four or five taller shelf props (the ceramic kiln furniture normally used when building up another shelf in the kiln). It works every time.
After reading this I put all my students’ pieces in my oven on 200 overnight, then fired on low before turning the kiln up. For the first time EVER, nothing exploded!! Thank you so much! I had been used to telling my students they only had a 50/50 chance of their work not exploding!
Yes this is a tricky bustiness we are in … the worst is to try and get a student to understand when her piece is in pieces …
Any comments from Southern Californians on drying out too fast?
Madeleine I learned ceramics in SoCal at Saddleback Community College. During summers, drying too fast had to be managed. I would cover completely with dry cleaner film, and then keep an eye on it for uneven drying. I would uncover the piece and mist it with water, and/or mist the inside of the film well and then recover. Patience was required!
I have used a food dehydrator to finish drying green ware during an especially rainy humid spring. Worked like a charm.
Just found this site and found some really helpful tips on drying. About 2 months ago I made a 12″ tall chameleon on an orb. Orb is hollow, lizard is from a pinch pot with added limbs and long curling tail. I’ve been doing ceramics for decades and I know to always leave a hole. However, I can’t recall if I did that with the lizard body! I’ve been “multi-tasking” on 2 other things while I work from home and clearly that is not a good thing. Lizard was slowly drying in a damp box for weeks, then with lid off for another week, and finally drying in open air for 2 weeks. It is bone dry. I want to make a hole in the body – possibly with a needle tool?? being super cautious of course. I have never run a pre-heat on my Olympic kiln, but this time I will program it for that prior to running a slow bisque (SB takes about 13 hours for me). If you have any more tips to help this piece survive I would love to hear them!